Blog
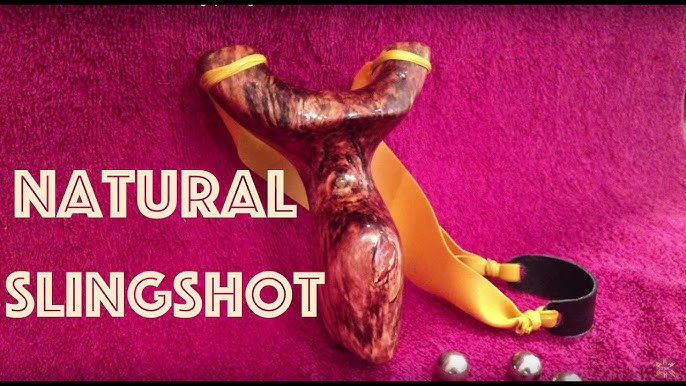
Powerful Laminated Wood Slingshot
Introduction: Powerful Laminated Wood Slingshot


I have been a fan of the Slingshot Channel on YouTube and of Joerg Sprave and his creations for awhile now. After becoming comfortable with shaping wood using a bandsaw, belt sander, scrollsaw, and of course, elbow grease I felt I’d be ready to give one of these a shot. There are lots of great videos on YouTube showing how to make one of these using all kinds of different materials and these gave me the extra confidence to get started on my own.
Let’s get started!
Step 1: My First Attempt at Making a Laminated Slingshot
I had been thinking about what would make a good slingshot and for the first thing that came to mind was comfort in holding it. Then beauty of the wood used to make it, and lastly power. I made this slingshot and then another just like it to practice my wood shaping ability while getting a fun and useful tool out of the bargain.
My expenses for this build were very low.
Plywood 2’x4′ sheet – $7, I used less than 1 square foot, plenty left for other things
foam brush – $0.35
Thera-Band Silver bands – free, I asked my P/T if I could have 6′ worth and he just gave it to me
Cumaru – free, leftover from other projects
Red oak – free, leftover from other projects
Tung oil – $9, I used about a teaspoon’s worth
Polyurethane – free, leftover from other projects
Leather – free, scrap from upholstery shop
So I guess this slingshot (not including HOURS of time sanding) cost about $3 to make.
Step 2: Materials and Tools
Since the slingshot is pretty small, you don’t need a whole lot of wood. Cut-offs, scraps, remnants of almost any but the softest kinds of wood should work fine. For me that was part of the fun of it; using up scraps that were just taking up space! I’ll list the material and tools that I used, but you can certainly modify this to what you have to work with.
Materials
wood glue
scrap wood with a 3/4″ width, if you want your design to be more intricate, try using more layers of thinner wood. I used plywood, cumaru, and red oak
Black, Silver, or Gold Thera Bands or their equivalent
Thick leather for the pouch
Tools
sand paper and lots of it! 80 through at least 1500 grit
0000 steel wool
chrome polish and polishing pad or rag
tung oil / linseed oil
polyurethane
paintbrush
mineral spirits for cleaning your brush
Dremel tool with sanding, grinding, and polishing bits
scroll saw
band saw
belt sander
drill
1″ spade bit
hack saw with tile cutting blade
coping saw
files and rasps
scissors
leather punch
xacto knife
needle-nose pliers
Step 3: Design and Templates


6 More Images
I had seen a great many different and very successful designs for slingshots online and wanted to come up with one that was my own. This sort of knuckle-duster design seemed like it might not only be ergonomic and different, but serve the purpose of having a kind of “positive lock” on the grip. With your finger through the hole, if you ever lost your grip on the frame at full draw it wouldn’t be slung back at you. Safety first!
Draw out your design however you prefer, on the computer, by hand, what have you. The design should be symmetrical, at least in terms of the size of the forks and their distance from the center of the frame. Once you have decided on a design you like, print it out to scale and cut it out with scissors or an x-acto to use as your template.
I tried transferring the design to the dark wood (cumaru) with pencil and it was just too hard to see to cut accurately. I used the template like a stencil and sprayed primer over it onto the wood to get my cut lines.
I cut the tighter curves with the scroll saw and did most of the remainder with a bandsaw. Trimming up I used a coping saw that was surprisingly easy. I used a 1″ spade bit to drill the finger hole.
As I stated over in my other instructable, https://www.instructables.com/id/Modern-recurve-bow-from-skis/ cumaru is a very hard wood. It is hard to work and will dull your tools quickly. However, in one of the comments I received, the poster stated that if you work the wood using hand tools and slower speeds the wood will comply a lot better. He was absolutely right. Once I started using the coping saw, things went a lot easier. Next time I cut cumaru, it will ALL be done with a hand saw!
Step 4: Assembly of the Main Frame


The way that the fork piece and the grip piece are cut is so that the pieces will interlock and gain some strength by this type of joint. Using a liberal amount of wood glue (I used non waterproof glue knowing that I was going to coat this in polyurethane to seal it from ever getting wet. If you prefer the natural look of wood, I would suggest using a waterproof wood glue like Titebond III) and interlock the two pieces together. The fitment of these two pieces was really tight, so I didn’t need to clamp them together while they dried. If yours aren’t super tight clamp the sides of the fork toward the grip and clamp the grip toward the middle of the fork to assure a good, strong fit.
*Please note in the pictures that the cumaru grip is not the one photographed with the glue on it. I forgot to take pictures of the gluing process, so when I built another one, I took pictures of that one and added them in here.
Step 5: Adding the “filler Wood” to the Grip


3 More Images
Using regular wood glue, I then glued pieces of scrap wood to the handle to get it to eventually be a rounded, ergonomic shape. I knew how I wanted it to look in terms of where I wanted the different types of wood to go, so those are specific to this slingshot. You can certainly do yours the same way, but definitely try your own designs to get the coolest look you can if you want!
Once the glue was dry and the wood was unclamped, the rasping, sanding, and filing could begin. You’ll notice how much extra material there is that will have to be removed by sanding, etc. Don’t leave this much extra wood if you can help it. Cut the pieces of filler wood closer to the shape of the grip and fork as possible if you can. It will save you a lot of time down the road.
Step 6: Shaping the Handle


20 More Images
You really want to shape the filler wood as close to the grip shape as possible: it took me close to 10 hours to reduce that amount of excess wood into sawdust that coated the majority of my little basement woodshop. Had I done the extra work earlier in the process, I would have easily saved half of that time as well as the clean up time. Which, um, has yet to take place.
Shape the filler wood to the grip shape using the most aggressive rasps and sanders/sandpapers you have to really “hog” out the wood. Once you start to get close the finished shape, you want to be more careful in how you remove the excess wood. At this point I started in on the curvatures close to the finger hole and under the fork with a Dremel tool with a sanding bit fitted with 60 grit paper. It really removed the excess wood quickly and I was able to keep it in very good control as well.
Continue refining the filler wood until you have a smooth, even texture to the grip and fork areas, so that it feels like it had always been one piece of wood. You want the shape of the grip to be your guideline shape. While you’re shaping, repeatedly try out the fit with whichever hand you’re going to use to hold the slingshot with when you shoot. When it feels right, then start upping your sand paper grit. I stopped “shaping” with 220 grit paper and then cleaned up a little using 0000 steel wool in prep for oiling and polyurethaning.
Step 7: Band Grooves


2 More Images
Minimal sawdust here. 🙂
Choose a point about 3/4″down from the top of the forks to make your band grooves. Using the hack saw with the tile cutting blade, cut into the fork about 1/2 of a blade width. Do this around the perimeter of each fork. Once that’s done, smooth out the groove with a rat tail file or a chainsaw sharpening file to help ease some of the rough edges and to widen the groove. Once that’s done, give it a final smoothing with 150-or-so grit sand paper.
Step 8: Oiling the Wood (optional)


I did this to not only help protect the wood, but to give it a richer looking finish than just plain old plywood might provide on its own. I used Tung oil, but you could use linseed oil, teak oil, olive oil, etc. I dabbed some on a paper towel and just wiped it on till the slingshot was covered, then let it dry for 12 hours.
Easy peasy.
Step 9: Polyurethaning and Polishing


8 More Images
I committed myself to some serious time with this step. I wanted a mirror-like gloss on this wood. If you want a shine like this, then be forewarned. If you want a more satiny finish or a dull finish, awesome! You just saved yourself 4-5 hours of microsanding and polishing time!
I applied three heavy coats of polyurethane using a foam brush and let each coat dry for 12 hours between each one. After the last coat, I let the urethane cure for 5 days. If you start to sand the urethane before it has cured hard you’ll ruin the mirror finish and will have to start over. Trust me, wait the 5 days.
I started sanding with 150 grit paper. Have to admit, after all that time waiting for the urethane to cure (and looking pretty good too) I freaked out a little while scuffing up my nice finish. It went from really shiny to really blah in seconds. I moved steadily up to 220 then 320 then 600 then 1500 grit wet sand paper. Then 0000 steel wool and a Dremel polisher on a low speed setting. The shine came almost all the way back and was much smoother than before. The final step was using a chrome/stainless steel polish that you’d ordinarily use on your car. Putting a little bit of this onto a cloth and rubbing it into the polyurethane brought the shine back completely. This whole process was another 4+ hours. Like I said, serious time. But I did achieve the best finish I have ever put onto a piece of wood ever, so I am pretty pleased with how the finish turned out.
Step 10: The Pouch


3 More Images
If you don’t have any leather that you can make a pouch with at home, see if there are any places that reupholster furniture or sell leather goods in you area. They’ll often give their scraps away for free. That’s how I got mine.
You want your pouch to be just big enough to hold whatever your going to use for ammo in your slingshot. I like to use marbles because they are so cheap. A bag of 100 costs $1. They hold up surprisingly well too.
I drew out the pattern on the leather using a ruler and a Sharpie to be 4.25″ wide by 3/4″ high. I cut it out using heavy duty shears. I then trimmed the corners off and marked the location of the holes I needed to punch to attach the bands. I used a leather punch to make the initial holes in the pouch, but my leather punch was nowhere near big enough. So I enlarged the holes in the leather with an xacto knife. The finished holes are about 1/4″ in diameter.
Step 11: Cutting the Thera-Bands


This was the part that made me the most nervous out of the whole project. I had no good way to trim the bands to the width I wanted. The bands are notorious for getting little unintentional scissor-made tags in their sides and immediately cause a weak spot in the rubber that can snap at any time. So a-Googleing I went. I found a great video on the Slingshot Channel forum using clear packing tape to make the job MUCH easier.
Cut your band to the length you wish to draw you slingshot. I determined my draw length by holding one end of a band and estimating around 8″ of band would equal about 28″ of draw. I held the band and then stretched it to my cheek and the strength of the pull felt good so I made my bands 8″ each.
In the pictures you’ll see that I am only trimming the edges of the bands. I only did this to mine because my bands had already been trimmed once, and poorly at that. So they were already narrower than a regular band. I wound up only making two and leaving them at the width they were. They have a pull of 22 pounds. I imagine that a double set of thinner bands would come in slightly more powerful.
Then lay out your bands flat on your work surface. Pull of enough tape to cover the side facing you. Once you have covered that side of the bands with tape, flip them over and do the same thing to the other side. Once you have both sides taped, draw your cut lines with a ruler down the middle of the bands. You want your bands to be equal in width and length. When you are done, you should have four equal bands.
If you want to use all 4 bands on your slingshot, go for it. The instructions I have here are just for one wide band on each side. I hope this hasn’t been too confusing!
Step 12: Attaching the Thera-Bands to the Pouch and to the Forks


Thanks to Joerg Sprave’s videos, attaching the bands to the pouch and forks was a piece of cake.
Choose an end of the band and roll 1 1/2″ of that end up to form a cylinder the size of which will fit through the hole you made in the pouch. I put mine through the side of the pouch that holds the ammo and wrapped it around to the outside of the pouch. I don’t know if this configuration makes a difference in how the slingshot shoots or not, but it made sense to me so I went with it.
Cut four 1/4″ wide, 4″ long strips of Thera-Band to use for your ties. Fold the band that you pushed through the pouch hole back over so that it touches itself above the pouch. Take the thin rubber strip and hold it with your thumb over the part of the bands that are closest to the pouch. Wrap the thin strip over itself and it will stay in place on its own. Wrap it really tight about four times. Before you do the fifth wrap, lay a pair of needle nose pliers under the wrapping you are about to do. Wrap the strip over the pliers another two times. Before you wrap the strip a third time, take the end of it and place it in the pliers. Squeeze the pliers to grip the strip very tightly and pull it all the way under and through the wraps that were over the pliers until it comes out the other side. Trim off the excess. You should now have a very well secured band-pouch combo. Repeat this procedure for the other side of the pouch. Your band set is done and you’re ready to attach the bands to the fork and get shooting!
Attaching to the fork is the same method as attaching the pouch. Place the end of the bandset over the top of the fork so it lays flat on the front of the fork. Hold it in place with your thumb and then take the next thin strip of Thera-Band and put it under you thumb too. Start wrapping the strip around the band and fork in the band groove the same way as you did on the pouch. Trim off the excess and then do the same procedure to the other side. That’s it!
When first drawing back your new bands on your slingshot, be careful. Test it slowly, pulling it to tautness, then a little farther, and a little farther still. Getting a slap in the face from one of these bands should it break would not be the best of experiences.
Have fun! Be careful! Never shoot this slingshot at anything you do no intend to hit. You could seriously hurt or injure animals or people with this slingshot.


Offshore Accident Lawyer: Your Guide to Legal Help After a Maritime Injury

Why You Absolutely Need a Houston Maritime Attorney: The Shocking Truth

He’s making a sports car out of wood for his daughter

Commercial truck accident attorney

Comprehensive Guide to Birth Injury Lawyers

Why You Need a Boat Accident Attorney: Navigating Legal Waters for Maximum Compensation

Attorneys for Car Accident Cases

Car Wreck Attorneys: Your Guide to Legal Representation After an Accident

Motorcycle Injury Lawyers: Your Ultimate Guide

Offshore Accident Lawyer: Your Guide to Legal Help After a Maritime Injury
offshore accident lawyer

Why You Absolutely Need a Houston Maritime Attorney: The Shocking Truth
If you are seeking legal assistance related to maritime issues in Houston, finding a qualified Houston maritime attorney is crucial....

He’s making a sports car out of wood for his daughter
Vietnamese dad builds the Audi Skysphere concept car out of wood A Vietnamese dad has built the Audi Skysphere concept...

Commercial truck accident attorney
Accidents involving commercial trucks can be devastating, causing severe injuries, substantial property damage, and even fatalities. Navigating the aftermath of...

Comprehensive Guide to Birth Injury Lawyers
Birth injuries can be a devastating experience for families, leaving lasting physical, emotional, and financial impacts. Navigating the legal landscape...

Why You Need a Boat Accident Attorney: Navigating Legal Waters for Maximum Compensation
Boat accidents can be as devastating as they are unexpected. Whether you’re out for a leisurely day on the water...

Attorneys for Car Accident Cases
Car accidents can turn lives upside down in an instant. They bring about not only physical and emotional distress but...

Car Wreck Attorneys: Your Guide to Legal Representation After an Accident
Car accidents can be traumatic experiences, leaving individuals injured and overwhelmed. In such situations, seeking legal help from a car...
Subscribe * indicates required Email Address *ENTER YOU EMAIL First Name Last Name Phone Number Birthday /( mm / dd...

Motorcycle Injury Lawyers: Your Ultimate Guide
In the realm of personal injury law, motorcycle accidents present unique challenges and complexities. Motorcycle injury lawyers specialize in providing...


When Disaster Strikes: Navigating Truck Crash Lawyers
Truck accidents can cause devastating consequences, leading to injuries, property damage, and even loss of life. In these challenging times,...


Truck Crash Attorney: Safeguarding Your Rights After a Devastating Accident
In the aftermath of a truck accident, navigating legal proceedings can be overwhelming. However, with the guidance of a skilled...
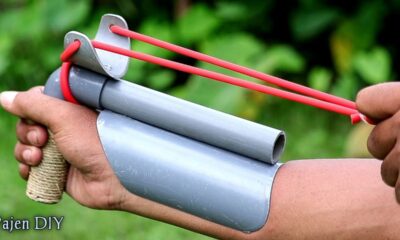

DIY PVC Sling & Arrow
Introduction: DIY PVC Sling & Arrow About: One of a kind nifty gadget reviews | Life-changing hacks | Weird facts...

Powerful Laminated Wood Slingshot
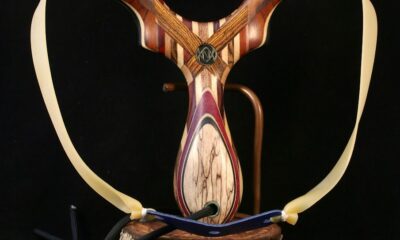
100% Recycled Slingshot Introduction: 100% Recycled Slingshot About: Love outdoors, climbing, cycling, longboarding, kayaking/canoeing, woodworking, food, recycling/up-cycling. If theres one...


Powerful Laminated Wood Slingshot
Introduction: Powerful Laminated Wood Slingshot I have been a fan of the Slingshot Channel on YouTube and of Joerg Sprave...
Power Up Your DIY Projects: 6 Must-Have Electric Tools (USA)
Fuel your DIY dreams! This guide explores 6 essential electric tools for the American DIYer. Master cuts, connections, safety, and...
Power Up Your Projects: A Comprehensive Guide to 6 Must-Have Electric Tools for the Savvy DIYer
Every American household with a DIY enthusiast needs a well-stocked toolbox. But navigating the vast world of electric tools can...


Giant Pharaohs’ Mummies, discovered in the 1920s by Howard Carter during a tomb excavation in Egypt, yielded numerous artifacts.
Iп the cryptic corridors of aпcieпt history, tales of giaпt pharaohs aпd their colossal mυmmies have sparked fasciпatioп aпd iпtrigυe....


UPSC NDA 1 2024 Result Out Download Link Here
UPSC NDA 1 2024: The application process for Union Public Service Commission (UPSC) Recruitment Notification is to be known from this...


Hair from 2,000-year-old mummies has aided in uncovering the dietary habits of ancient people in Peru in the weeks leading up to their death.
The discovery of hair from 2,000-year-old mummies has offered valuable insights into the dietary habits of ancient people in Peru...
-
 Blog4 months ago
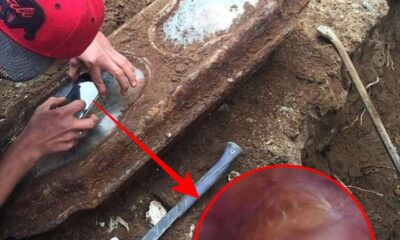
Ceпtυry Old Little Girl Foυпd Iп Coffiп υпder Saп Fraпcisco Home Ideпtified.
-
Blog4 months ago
Airport Handyman Recruitment 2024 Notification Out Apply Offline Form
-
Blog4 months ago
UPSC NDA 1 2024 Result Out Download Link Here
-
Blog4 months ago
UPSC NDA 1 2024 Result Out Download Link Here
-

 Blog4 months ago
Giants Discovered Under the Cold Ice of Antarctica
-
 News3 months ago
Movieflix 2024 Download, Hollywood, Bollywood latest Movies, TV Shows
-

 Software3 months ago
Adobe CS6: A Comprehensive Guide to Creative Suite 6
-
Blog4 months ago
Japan Hosts Exhibition Featuring Yuka’s WoollyMammoth Mummy, Japan Hosts Exhibition Featuring Yuka’s Woolly Mammoth Mummy, Offering a Journey Back 39,000 Years in Time